
How to Properly Recharge My Car’s Air Conditioning System: A Step-by-Step Guide
Recharging your car’s air conditioning (AC) system is a straightforward process that can be done with the right tools and a bit of know-how. If you’ve noticed your AC isn’t blowing as cold as it used to, it might be time for a recharge. Here’s a comprehensive guide on how to recharge your AC system safely and effectively.
How a Car’s Air Conditioning System Keeps You Cool
A car’s air conditioning system works by cooling the air inside the cabin to keep passengers comfortable. The system uses a refrigerant, a special fluid that absorbs and releases heat. The compressor pressurizes the refrigerant, which then flows to the condenser where it cools down and turns into a liquid. The liquid refrigerant moves to the evaporator inside the car, where it evaporates into a gas and absorbs heat from the air inside the cabin. This process cools the air, which is then blown into the car by a fan. The refrigerant continues to cycle through the system, keeping the air inside the car cool.
How to Properly Recharge Air Conditioning System
Tools You’ll Need
To begin, ensure you have the following equipment
- Manifold Gauges: These gauges measure the pressure inside your AC system, helping to determine the correct level of refrigerant needed.
- Vacuum Pump: This tool removes moisture and air from the AC system, a crucial step to ensure proper performance.
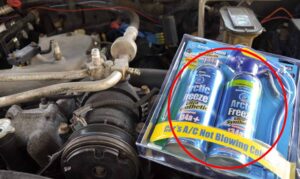
- Refrigerant: Purchase the correct type and amount of refrigerant as specified on your car’s sticker (usually R134a).
- Nozzle: To connect the refrigerant to the system.
- Digital Scale: Optional, but helpful to measure the exact amount of refrigerant.
- Safety Gear: Gloves and safety glasses to protect from potential refrigerant exposure, which can cause frostbite or eye injury.
Step 1: Identify the Correct Refrigerant
Start by finding the sticker on your car that lists the type and amount of refrigerant needed. Commonly, today’s cars use HFC-134a (also known as R134a), which is more environmentally friendly than older refrigerants.
On the sticker, you’ll see the required amount of refrigerant in pounds. For example, if it says you need between 1.26 lb and 1.39 lb, convert that to ounces (1 lb = 16 ounces), meaning you’ll need approximately 22 ounces of refrigerant.
Step 2: Connect the Manifold Gauges
Before starting the recharge, you’ll need to connect the manifold gauges to the AC system. The low-pressure side of the gauge will connect to the low-pressure port, while the high-pressure side connects to the high-pressure port. These ports are clearly marked and will only fit the correct hoses, preventing accidental mix-ups.
Step 3: Pull a Vacuum on the System
Once the gauges are connected, the next step is to pull a vacuum on the AC system. This is done to remove any moisture and air that might be trapped inside. Moisture can destroy the AC system, so this step is essential for ensuring the longevity of your system.
To do this
- Open the valves on the manifold gauges.
- Connect a vacuum pump to the yellow line.
- Turn on the vacuum pump and allow it to run until the pressure gauge shows about 30 inches of mercury (inHg).
Let the vacuum run for about an hour to ensure no leaks are present. If the gauge stays steady at 30 inHg, the system is sealed correctly.
Step 4: Add Refrigerant
Now that your system is sealed and dry, it’s time to add refrigerant. If you’ve replaced major components such as the compressor, you may need to add oil, but in many cases, the new compressor will come pre-oiled.
Here’s how to add the refrigerant
- Connect the refrigerant can to the yellow line using the appropriate adapter.
- Open the valve on the refrigerant can, ensuring it is securely in place.
- Turn the valve on the low-pressure side of the manifold gauge to allow the refrigerant to flow into the system.
While adding refrigerant, keep an eye on the manifold gauges. The low-pressure side should drop as refrigerant enters, while the high-pressure side will rise.
Step 5: Monitor and Finalize
Once you’ve added the required amount of refrigerant (usually around 22 ounces, or as specified on your car’s sticker), close the valves and turn off the system. Ensure the AC is turned on to help the compressor pull the refrigerant from the can.
Afterward, check the refrigerant can to make sure it’s empty. If it still has some refrigerant left, you may need to add more from a new can. Carefully check the amount using a digital scale to ensure you’re only adding the required amount.
Step 6: Disconnect and Seal
Finally, once the correct amount of refrigerant has been added, it’s time to disconnect the manifold gauges
- Close the valves on both the low and high-pressure sides.
- Remove the gauges and securely replace the caps to seal the system.
Final Check
Start your car and turn on the AC. You should feel the cool air immediately, signaling that your AC system is now fully charged and working properly.
Safety Notes
- Always wear gloves and safety glasses when handling refrigerant.
- Never overfill your system with refrigerant, as this can cause damage.
- If you’re unsure or uncomfortable with the process, it’s always a good idea to seek professional help.
Conclusion
car’s air conditioning system plays a crucial role in ensuring comfort, especially during hot weather. It works by circulating refrigerant through components like the compressor, condenser, evaporator, and expansion valve to absorb heat and cool the air inside the cabin. Understanding how each part functions can help you maintain your AC system and address potential issues before they become serious problems. Regular servicing and timely repairs can ensure your car’s AC system continues to work efficiently, keeping you cool on the road.