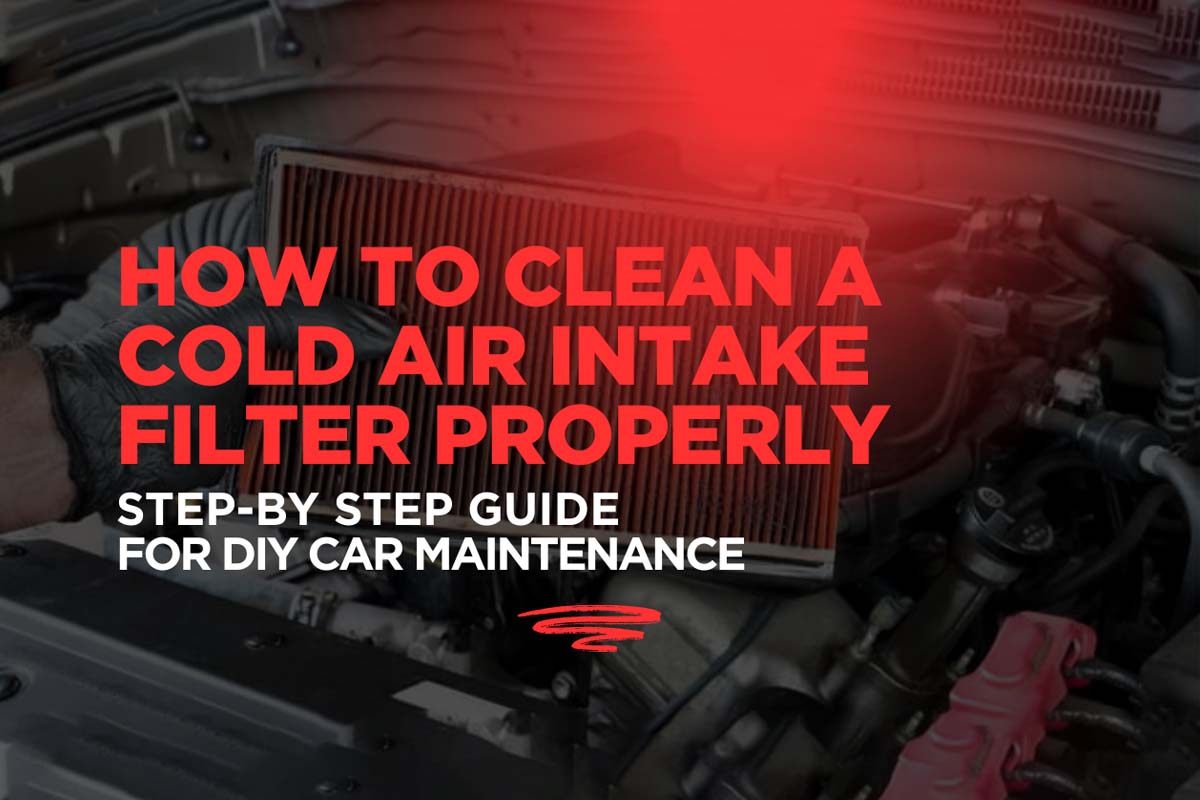
How to Clean a Cold Air Intake Filter Properly: Step-by-Step Guide for DIY Car Maintenance
Keeping your car running at its best requires more than just oil changes and tire rotations. One often-overlooked component is the cold air intake filter—a vital part of your engine's breathing system. A dirty air intake can restrict airflow, reduce performance, and even harm your engine over time.

In this guide, we’ll walk you through how to properly clean a cold air intake filter, using a Subaru WRX as an example. Whether you're a beginner or just need a refresher, this tutorial will help ensure your air filter stays in peak condition.
What Does an Air Filter Do?
The engine in your vehicle requires a precise mixture of air and fuel for efficient combustion. Air enters the engine through an intake tract and manifold, but before it gets there, it must pass through the air filter. This filter traps dust, leaves, and other debris, preventing contaminants from entering the engine and causing damage.
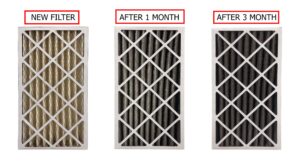
Over time, the filter becomes dirty and clogged, reducing the amount of air that reaches the engine. This disrupted airflow affects the air-to-fuel ratio and leads to several performance issues.

Symptoms of a Clogged Air Filter
A dirty air filter can mimic other engine problems, making diagnosis tricky. Some common symptoms include:
- Sluggish acceleration
- Rough idling or engine misfires
- Reduced fuel economy
- Unusual suction noises from the engine
- Dark, fuel-smelling exhaust smoke
- Check Engine Light (often with codes like P0171 for lean air/fuel mixture)
These issues develop gradually, making them hard to notice until the problem becomes severe.
How to Check Your Air Filter
Fortunately, checking your air filter is one of the simplest DIY car maintenance tasks. Most air filters are housed in a plastic air box under the hood, secured with just a few clips. In many vehicles, no tools are needed.
Once opened, you can inspect the filter. If it appears dark, dusty, or clogged with debris, it’s likely time for a replacement.
How to Clean Air Intake Filter Properly
Tools & Materials You’ll Need
Before we get into the step-by-step process, here’s what you’ll need:
- Flathead or Phillips screwdriver
- Air filter cleaning solution (preferably from your filter manufacturer)
- Garden hose (with moderate water pressure)
- Clean towel or microfiber cloth
- Oil (if using an oiled air filter)
- A well-ventilated drying area
Step 1: Remove Any Obstructions
Start by opening your hood and identifying the air intake system. Depending on your vehicle make and model, the intake may have additional covers or induction components that need removal.
In our example, the Subaru WRX had a factory-installed air induction unit. Use a flathead screwdriver to pop off any plastic or rubber grommets that may be holding these parts in place. Remove these carefully to avoid damaging them.
Step 2: Disconnect the Intake Filter
Next, locate the clamp holding the air filter in place. Most filters are secured with either a flathead or Phillips screw-type clamp. Loosen this clamp slowly and carefully, avoiding too much force.
For instance, the WRX in the video had a COBB short-ram intake feeding air directly to the turbo. Removing the filter gently is important to avoid damaging the cotton gauze or any structural components of the intake.
Step 3: Knock Out Loose Debris
Once the filter is removed, give it a good tap to knock loose any visible debris. Don’t be surprised if bugs, dirt, or leaves fall out. Even if the filter doesn’t look terrible, small debris trapped in the folds can reduce efficiency.
Pro Tip: Avoid banging it too hard—especially against hard surfaces—as this can damage the internal structure of the filter.
Step 4: Apply Cleaning Solution
Use a dedicated air filter cleaning spray—ideally one recommended by your filter’s manufacturer. In this case, the cleaner came from COBB and was designed specifically for their cotton-gauze filters.
Spray the cleaner generously over the entire surface, making sure to get into all the folds and crevices. Let the solution sit for 10–15 minutes to break down grease, dirt, and grime effectively.
Step 5: Rinse the Filter (Inside-Out)
After the cleaning solution has soaked in, it’s time to rinse. This step is crucial and technique-sensitive.
- Always rinse from the inside-out of the filter.
- Using your garden hose (not a pressure washer), flush water through the filter to push dirt outward.
- Avoid spraying from the outside in, as this can embed debris deeper into the filter.
Be thorough. Take your time moving along each pleat to ensure all dirt is washed away.
Step 6: Let the Filter Air Dry Completely
Shake off as much excess water as possible without twisting or wringing the filter. Set the filter in a warm, sunny, and breezy location to air dry naturally. This could take several hours depending on your climate.
Avoid using compressed air to speed up drying. It may seem tempting, but it can damage the filter fibers and reduce effectiveness.
Step 7: Re-Oil the Filter (If Applicable)
If your intake system uses a reusable oiled air filter, this step is essential for capturing dust and dirt particles. Use the correct type of filter oil—not motor oil, WD-40, or transmission fluid.
- Spray oil in straight lines, moving from one end to the other.
- Ensure complete coverage across all pleats.
- Let the oil sit and absorb for 15–20 minutes.
If you see any dry patches, apply a bit more oil. Wipe off any excess that spills over with a clean cloth.
Step 8: Reinstall the Air Filter
Once the filter is clean, dry, and oiled (if needed), it’s time to reinstall it.
- Slide the filter back onto the intake tube gently, ensuring a snug fit without bending or damaging the filter.
- Tighten the metal clamp just enough so the filter doesn’t wiggle or shift—especially under throttle or boost.
- Reconnect any parts you removed earlier, such as the air induction or factory air box inlet.
- Secure all plastic clips and rubber grommets.
Double-check your work before closing the hood to ensure everything is securely fastened.
Pro Tips for Long-Term Maintenance
- Avoid DIY hacks like using motor oil or household cleaners.
- Stick with name-brand cleaning and oiling kits designed for automotive filters.
- Clean your air intake every 10,000 to 15,000 miles, or more frequently if driving in dusty or off-road conditions.
- Never reinstall a damp filter—moisture can damage your engine’s sensors or internal components.
- Keep a maintenance log for better tracking.
How Often Should You Replace the Air Filter?
Air filters should generally be replaced every 30,000 to 50,000 miles, but more frequent checks are advised, especially if you drive in dusty environments. Even if it hasn’t hit the mileage mark, inspect it every 12,000 to 15,000 miles and clean or replace it as needed.
Dealerships typically include air filter replacements in scheduled services at 30k, 60k, or 90k miles. However, if you do your own maintenance or go to an independent shop, it might be overlooked.
Conclusion
A clean air intake filter ensures your engine gets the proper airflow it needs for optimal performance, fuel efficiency, and longevity. While it might seem like a small task, regularly cleaning your cold air intake is one of the best things you can do for your vehicle.
Whether you drive a Subaru WRX, a Honda Civic, or a Ford F-150, the steps are largely the same. This DIY-friendly process takes less than an hour and can save you money in the long run while helping your car breathe easier.
If you found this guide helpful, don’t forget to bookmark it for your next maintenance day. Keeping your intake clean is just one small way to show your car some much-needed love.